
When it comes to chandelier installation, understanding the nuances can make all the difference. You’ll want to choose the right chandelier for your space, guaranteeing it complements your decor and fits properly. With the right tools and safety precautions in place, you can avoid costly mistakes. But what are the essential steps to guarantee a seamless installation? Let’s explore the process further.
Understanding the Benefits of Professional Installation

When you opt for professional chandelier installation, you not only guarantee a secure and safe setup but also tap into the expertise that can save you time and stress.
While a DIY chandelier project may seem appealing, the complexities of modern lighting chandeliers and the weight of unique chandeliers can pose significant challenges.
Professional installers understand electrical safety standards, ensuring your chandelier isn’t only beautifully displayed but also securely mounted.
They possess specialized knowledge to handle intricate wiring and support requirements, minimizing the risk of accidents.
Essential Tools for Chandelier Installation

Before you start your chandelier installation, make sure you’ve got the right tools on hand.
Key items like a sturdy ladder, screwdriver, wire nuts, and wire strippers are essential for a smooth process.
Don’t forget your safety equipment—gloves and goggles will help protect you while you work.
Necessary Tools Overview
Installing a chandelier requires a specific set of tools to guarantee a safe and efficient process.
First, grab a sturdy ladder to reach your ceiling chandelier comfortably. You’ll need a screwdriver to remove old fixtures and secure your modern crystal chandelier in place. Wire strippers are essential for preparing wires, while wire nuts verify secure connections.
Additionally, a voltage tester is vital to confirm the power is off before you start. Don’t forget a drill for attaching any necessary mounting brackets.
With the right tools, you can effortlessly transform your space with stunning hallway light fixtures, creating a sophisticated atmosphere. Make sure your toolkit is ready, and you’re on your way to a successful installation.
Safety Equipment Essentials
Safety equipment is essential for a successful chandelier installation, ensuring you protect both yourself and your home.
Start with a sturdy ladder that can safely support your weight while you work, especially when handling heavier pieces like a black chandelier.
Wear safety goggles to shield your eyes from debris, and consider gloves to protect your hands during installation.
A voltage tester is vital for confirming the electricity is off before you begin.
Don’t forget to use a hard hat if you’re working in a high entryway, as falling fixtures can cause injury.
Prioritize safety to enjoy the beauty of your chandelier design, whether you’re installing an elegant entryway chandelier or a statement piece in your living room.
Safety First: Turning Off the Power
To secure a smooth chandelier installation, you must prioritize turning off the power at the breaker box. This vital step prevents any electrical hazards while you’re working, especially when handling intricate chandeliers for living room spaces.
Before you begin, identify the correct breaker that controls the circuit for your existing light fixture. Once you’ve switched it off, use a voltage tester to confirm there’s no live electricity. This practice not only safeguards you from potential shocks but also guarantees a secure installation.
Assessing Your Ceiling’s Weight Support

Before you hang your new chandelier, it’s crucial to assess whether your ceiling can support its weight. Most chandeliers weigh between 50 and 75 pounds, so you need to verify your ceiling box is rated accordingly.
Check the manufacturer’s specifications for the chandelier and confirm that your ceiling box meets or exceeds this requirement. If you’re uncertain, consider consulting a professional.
Inspect the ceiling structure for any signs of wear or damage, as this can affect weight distribution. If you find that your current setup isn’t adequate, you may need to reinforce or replace the ceiling box.
Prioritizing this step not only guarantees your chandelier hangs safely but also enhances its visual impact in your space.
Step-by-Step Guide to Removing Old Fixtures
Once you’ve confirmed your ceiling can support the weight of your new chandelier, it’s time to remove the old fixture.
Begin by verifying the electricity is turned off at the breaker box for safety. Use a ladder to reach the fixture, then follow these steps:
- Carefully detach any decorative elements or shades.
- Unscrew the fixture from the ceiling mount, supporting it as you do.
- Disconnect the wiring, noting the connections for reference later.
- Remove the mounting bracket from the ceiling.
Taking your time during this process will prevent damage and guarantee safety.
Once the old fixture is down, you’ll be ready to proceed with your exciting chandelier installation!
Proper Wiring Techniques for Chandeliers

When wiring your chandelier, understanding color codes for the wires is vital to guarantee a proper connection.
You must secure all connections tightly to prevent any electrical hazards.
After everything is connected, testing for safety is essential to confirm that your installation is both secure and functional.
Wiring Color Codes
Understanding wiring color codes is essential for safely installing your chandelier. Familiarizing yourself with these codes guarantees you connect wires correctly, minimizing the risk of electrical issues.
Here’s a quick reference for common wire colors:
- Black (or Red): Hot wire, carries current from the power source.
- White: Neutral wire, completes the circuit by returning current.
- Green (or Bare Copper): Ground wire, protects against electrical shock.
- Blue or Yellow: Often used for additional circuits or fixtures.
Always double-check your local electrical codes, as variations may exist.
Secure Connections Required
To guarantee a safe and effective chandelier installation, secure connections are essential for preventing electrical hazards.
Start by stripping about half an inch of insulation from each wire end. When connecting, match the wires—black to black, white to white, and green or bare to ground.
Use wire nuts to twist the connections tightly, ensuring no copper shows; this prevents shorts. Don’t forget to tuck the wires neatly into the ceiling box, leaving a bit of slack for future adjustments.
Finally, double-check that all connections are solid before securing the fixture. By focusing on these details, you create a reliable, innovative lighting solution that enhances your space while ensuring safety.
Testing for Safety
After securing the connections, it’s time to guarantee safety by testing the wiring. First, you should double-check that the power is off to avoid any electrical hazards.
Then, follow these steps to verify everything is safely wired:
- Use a voltage tester: Confirm that no electricity is flowing through the wires.
- Inspect connections: Validate all wire nuts are tightly secured and no bare wire is exposed.
- Check for stability: Gently tug on the chandelier to ascertain it’s securely mounted.
- Perform a final power test: Once everything looks good, restore power and test the chandelier to make sure it functions properly.
Avoiding Common Installation Mistakes
While tackling chandelier installation, it’s vital to be aware of common mistakes that can lead to both safety hazards and aesthetic issues.
First, always make sure the power’s off at the breaker box—this is important for your safety. Next, check the ceiling box’s weight rating; it should support at least 50-75 pounds for your chandelier.
When reconnecting wires, double-check their placement to avoid hazards. Be cautious not to over-tighten screws on the electrical box, as this can cause looseness.
Finally, leave enough wire slack to prevent future electrical issues. By sidestepping these pitfalls, you’ll guarantee a safe and visually stunning chandelier installation that enhances your space beautifully.
Choosing the Right Chandelier for Your Space

How do you choose the perfect chandelier for your space? Start by considering your room’s size and ceiling height, guaranteeing the chandelier complements rather than overwhelms.
Next, think about the style—modern, traditional, or eclectic—and how it aligns with your existing decor.
Lighting needs are also essential; a brighter fixture may suit dining spaces, while softer lighting works better in bedrooms.
Finally, don’t forget about scale and proportion to create visual harmony.
- Assess room dimensions and ceiling height
- Match chandelier style with existing decor
- Determine lighting needs for functionality
- Guarantee scale complements the space
Maintenance Tips for Your Chandelier

A sparkling chandelier can be the centerpiece of any room, but keeping it in pristine condition requires regular maintenance.
Start by dusting your chandelier monthly with a microfiber cloth to prevent buildup. For deeper cleaning, mix a solution of warm water and mild soap, dampen a soft cloth, and gently wipe each crystal and surface—avoid harsh chemicals that can damage finishes.
Check the bulbs regularly; replace any burnt-out ones to maintain brightness. Additionally, inspect the wiring and connections every six months to guarantee safety and functionality. If you notice any loose parts, tighten them carefully.
Regular maintenance not only enhances the chandelier’s beauty but also extends its lifespan, assuring it remains a stunning focal point in your space.
Finding Professional Installation Services
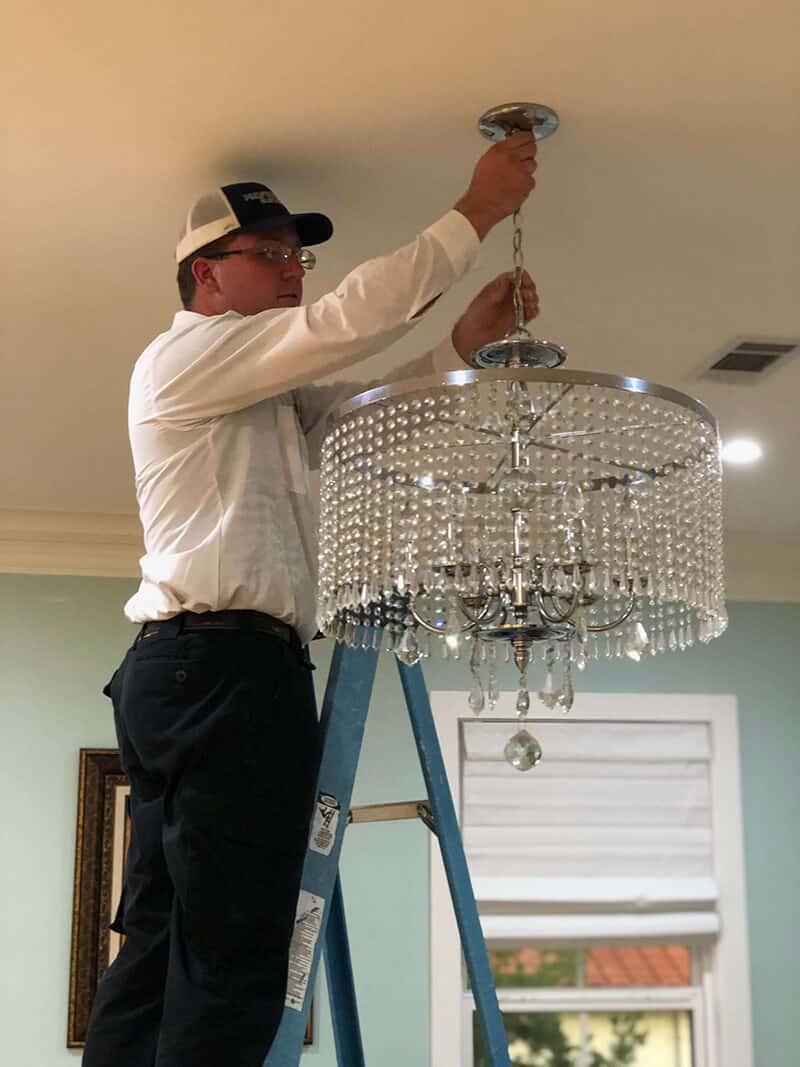
Maintaining your chandelier’s beauty and functionality is only part of the equation; professional installation services play an essential role in guaranteeing safety and proper setup.
To find the right service, consider these key factors:
- Experience: Look for installers with a proven track record in chandelier installations.
- Certifications: Verify they adhere to electrical safety standards and possess necessary licenses.
- Reviews: Check customer feedback to gauge their reliability and quality of work.
- Quotes: Obtain multiple estimates to compare pricing and services offered.
Frequently Asked Questions
How Do I Choose the Right Chandelier Style for My Home?
To choose the right chandelier style for your home, consider your decor theme, room size, and lighting needs. Explore diverse designs, from modern to vintage, ensuring it complements existing elements while enhancing ambiance and functionality.
What Is the Typical Cost of Professional Chandelier Installation?
Picture the shimmering elegance of your new chandelier lighting up your space. Typically, professional installation costs range from $150 to $500, depending on complexity and location, ensuring safety and precision for your stunning centerpiece.
How Long Does a Chandelier Installation Usually Take?
Chandelier installation usually takes about two to four hours, depending on complexity. You’ll need to guarantee proper support and wiring, so having the right tools and knowledge is essential for a smooth process.
Can I Install a Chandelier in a High Ceiling Room?
Absolutely, you can install a chandelier in a high ceiling room. Just make certain you’ve got the right tools and support, as hanging it becomes a balancing act—one wrong move could lead to disaster. Safety first!
What Should I Do if My Chandelier Is Flickering After Installation?
If your chandelier’s flickering, check the wiring connections first. Confirm they’re secure and properly connected. If the issue persists, inspect the bulb and dimmer switch compatibility, or consult a professional for a thorough assessment.
